Choosing the Right Smilies
September 19, 2007 Posted by Tyler CruzAs the owner and operator of 10 forums, I’ve had the repeated and inevitable task of adding new smilies to my forums to cater to my members’ interest.
While I’ve added many hundreds of smilies in my lifetime as a forum administrator, I had never really taken the time to look at the fine details and characteristics that all smilies contain. That is, until yesterday, while I was adding 69 new smilies to MovieForums.org and finally noticed these fine details.
In this blog post, I hope to share some of the fine details that I discovered, and the effects they can have on your forum. I’m sure that after reading this post you’ll leave with a newfound smilie knowledge which you will hopefully implement on your forums.
That being said, let’s begin!
Halo Effect
The main issue with similies in the “halo effect”. The halo effect is when a transparent smilie isn’t perfectly transparent, and white pixels occur around the image.
Normally these smilies look just fine and you never notice the halo effect. In fact, most newer smilies have the halo effect because people started using and designing smilies that had a smoother outer circle.
In fact, vBulletin’s default smilies that they use and ship with vBulletin are actually these new smilies. And thus, they produce the halo effect.
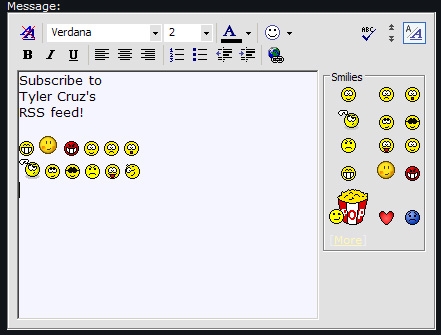
Let’s look at the screenshot below. Here you see the default smilie set in vBulletin.
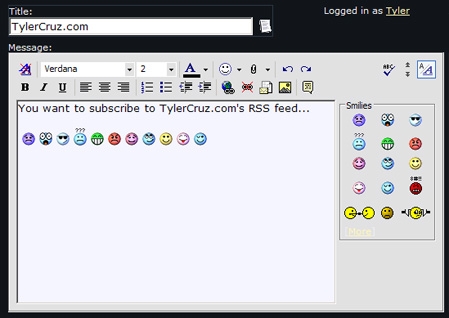
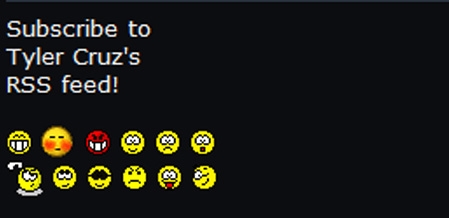
As you can see, they look just fine in both the white editor background and the gray panel. But look what happens when they are posted on a skin with a dark background:
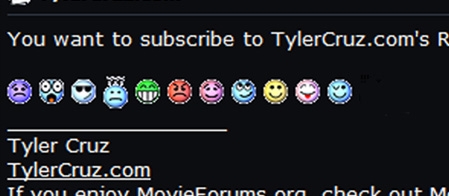
Ack, not so pretty anymore, right? This is the dreaded halo effect.
See the white pixels I was talking about? On a dark background they are revealed and don’t blend well in the design.
The Problem with Color-Specific Smilies
So then, what can we do about this? The first thing you may think of would be to grab the PSD’s of the smilies and edit them. vBulletin does, in fact, provide PSD’s of all their images, including their smilie sets and thus their background images can indeed be easily changed.
However, there is just one problem with doing this:
That’s right, they will appear in the WYSIWYG editor’s smiliebox. Also, what if you decide to change your background again? Each time you’d have to change all your smilies. And if you have several hundred smilies, this could take a while.
Pixelized Smilies
So what’s a forum administrator to do, then? Well, the answer in my opinion is to use what I refer to as “Pixelized Smilies”.
Pixelized smilies are simply similes that have no halo effect, which is resolved by having a black border around the smilie and/or any objects around the smilie. They do not look as smooth as “halo” smilies, but the difference is very minimal, and realistically there is virtually no noticeable difference.
Their edges can appear a bit rougher, but they will have no halo effect and can be used on ANY BACKGROUND, unlike halo smilies which can only be used on light-coloured backgrounds.
Below is a screenshot of a replacement set of pixelized smilies I gathered and now use instead of the default vBulletin halo smilies:
And as you can see below, they look just fine on a dark background:
So the key for when you look for new smilies to add to your forum, is to avoid “halo” smilies, and grab the “pixelized” smilies.
Here are a couple of good smilie sites which contain mostly pixelized smilies (1 | 2).
The Tyler Technique
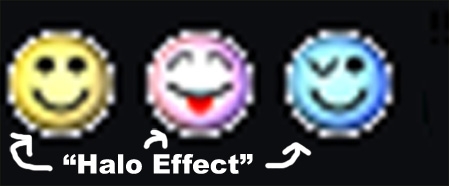
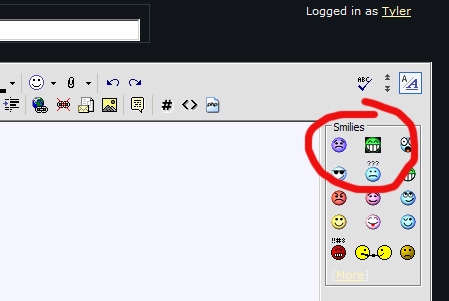
Now that you know what to look for and what to avoid, I’ll teach you a quick way to see which smilies are “halo” smilies. You can call this the “Tyler Technique” if you like, but if you’re normal you’ll call it the “Highlighting Technique”.
Just as it sounds, the “Highlighting Technique” is where you highlight the smilie or smilies with your mouse or a CTRL+A command. Doing this will highlight the entire image with a blue color and give an idea how the smilie looks on a dark background. You will be able to easily spot “halo” smilies this way, and it’s useful since it literally takes only a second to do.
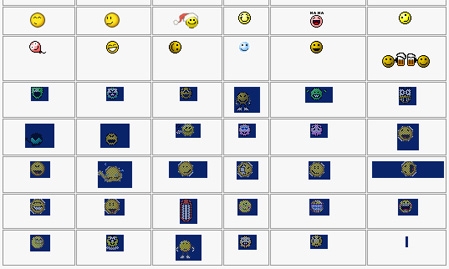
As you can see in the screenshot below, the “halo” smilies are easily identifiable (the top left one you could probably use on a dark background and still get away with, though):

Be Wary of Appendages & Symbols
There’s one more thing you need to be aware of other than “halo smilies”, and that is appendages and symbols. Take the following smilies for example:
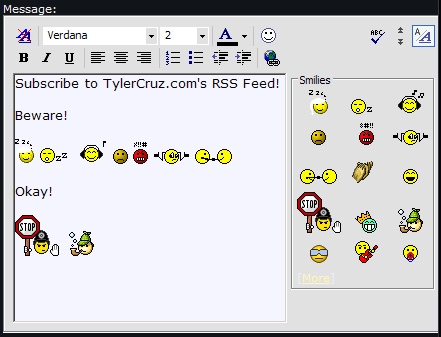
As you see, they look fine above (except for the first sleeping one), but take a closer look. Do you notice anything that might be an issue?
That’s right, all of them either have arms or symbols (the one between the angry one and the musical one actually flashes question marks above his head, which you can’t see in the screenshot since it was animated). And more importantly, the arms and symbols are black.
This creates a problem when used on a dark background, as shown below:
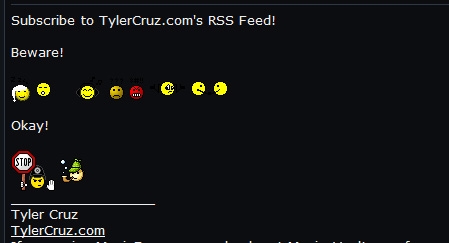
Whoa, what went wrong? Now you see the problem. Actually, the first emoticon, the sleepy one, is one of the worst I’ve ever seen because it displays incorrectly on BOTH light and dark backgrounds since it has a white nightcap with no black outline which makes it display incorrectly on light backgrounds, and then it has black Z’s which makes is display incorrectly on dark backgrounds!
So when you’re grabbing smilies for your forum, be on the lookout for smilies which have appendages like those or symbols.
You’ll notice that the “Stop” and “Detective” smilies display fine in both light and dark backgrounds. This is because they have black outlines, which is why even the bubbles display fine for the detective.
“Smart” Smilies
Lastly, I noticed a couple of what I call “smart” smilies. I thought this was a simple but clever way of overcoming the background problem.
The two smilies below are both animated, and flash a question mark and Z’s respectively. As you can see, they both display fine on a light background:
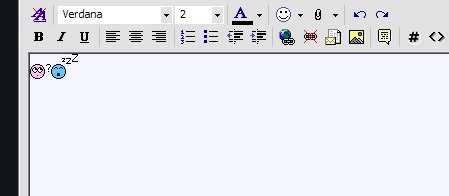
And with absolutely no modifications from myself, they display fine on a dark background as well! Remember, these are blinking, animated, smilies.

You may notice that the question mark and Z’s are black in the above image, but white in the bottom.
The trick is simple. The creator of each smilie simply had the question mark and Z’s alternate between displaying white, then black! This gives the illusion that it’s just one solid colour blinking, when in fact it’s just two different colours alternating.
I think this is a smart idea, although it’s not perfect if used on an inbetween colour such as orange where you can see both the white and black.
So there you have it, a descriptive guide to choosing the right smilies!
This post took me over 3-hours to make due to the research, smilie uploading and staging for the screenshots, and writing, so if you enjoyed it or learned something from it, if you could take 5-seconds to Digg this post by clicking the button below or by linking to it from your website or blog, It’d be appreciated!


Nice post Tyler. For an article on smiley’s it really is indepth. Kudos to you for making such a good post out of suck a topic. 😉
Sorry about the typing error. It should be “such” instead of “suck”.
Haha, I was thinking the same thing. The topic is … interesting, but the article was amazingly well done. 😛 Haha…
yeah lol, I don’t know what to say really. if there is an authority page for this topic, this is it.
Tyler, I like how your posting more often. I used to hate waiting days for a new post and to be honest I veered away from the site because of this.
However, it seems lately where getting a new post everyday.
I wonder if this is why your RSS is increasing, I bet if you keep this up you will be at 1k before no time.
Keep up the good work.
Tyler,
What a great post! I’m now going to check the smilies on all my forums, to make sure they don’t have any ‘halos’.
Daniel
Nice Write up but do smilies really make a difference?
Thanks for the hint about the halos, I guess I should go and check on my forums now :P.